
This tutorial explains the steps of developing a React Native app that connects to a private Ethereum node in Kaleido.io.
Why might anyone want to do this? Here’s a business case – A group of participants may have established a private Blockchain to trade with one another. They would have been keen to build a mobile app in React Native to be used among themselves.
But wait, how’s the techniques of building this app different from building an app to connect to a public Ethereum node like how I have documented it in the Minimum Viable Wallet tutorial? Actually, it is similar, apart from the fact that Kaleido requires you to send an authorization header to its Ethereum node unlike Infura which only needs you to provide URL with an API key.
And unfortunately, as of this writing, Web3.js’s HTTPProvider that is used for making RPC calls to Ethereum nodes behaves somewhat quirky when you try to send the authorization header.
Prerequisites
You will probably want to read these before continuing with this tutorial:
- Deploy a Private Ethereum Blockchain in 10 minutes: Start off by launching your own private blockchain instance. We will connect to it in this tutorial.
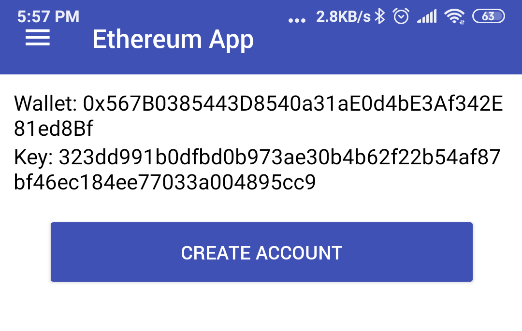
- Minimum Viable Ethereum Mobile Wallet: In this tutorial, I explained how I developed a Minimum Viable Ethereum Wallet that lets you keep ETH and run Smart Contracts.
In this tutorial, I will connect my Minimum Viable Ethereum Wallet (MVW) to a Kaleido private Ethereum Blockchain.
Deploying a Smart Contract in Kaleido
Start by deploying the same Smart Contract that we have deployed when building MVW in Kaleido. Make sure that your MetaMask has connected to your Kaleido node.
Then go to Remix to deploy this Smart Contract. This Smart Contract does nothing but store and read a string of text from the Blockchain.
pragma solidity ^0.4.24;

contract StringStorage {
    string storedString;

    constructor(string x) public payable {
		set(x);
	}

    function set(string x) public payable {
        storedString = x;
    }

    function get() public view returns (string) {
        return storedString;
    }
}
Note the Smart Contract’s address. We will need to enter it into MVW later.
Authorization
We will need the connection URL and connection headers to access our Kaleido node from MVW. Previously in Deploy a Private Ethereum Blockchain in 10 minutes, we configured MetaMask to access this node using a Username and Password provided by Kaleido.
Connecting to our Kaleido node with MVW is somewhat different; we will need a connection header rather than a username and password.
Click on the node that you wish to connect to.

Click [Connect Node].

Click [View Details].

Select the Application Credentials that you used in Deploy a Private Ethereum Blockchain in 10 minutes. Enter the Secret Key (it is the same one you used in the previous tutorial, but if you forgot, just REGENERATE].

There are 2 pieces of information to copy, CONNECTION URL and CONNECTION HEADER. Copy them.

Configuring MVW
In your MVW project, edit \HomeScreen\index.js.
Change this:
global.web3 = new Web3(
  new Web3.providers.HttpProvider('https://ropsten.infura.io/v3/<add your api key here>'),
);
To this:
global.web3 = new Web3(
	new Web3(new Web3.providers.HttpProvider('https://<CONNECTION URL>',0,{Authorization: 'Basic <CONNECTION HEADERS'}))
)
Paste the CONNECTION URL and CONNECTION HEADER that you copied from the previous step here.
Be careful – It should say “Authorization” and not “Authentication”!
This will point MVW to your private Ethereum Blockchain instead of to Ropsten with Infura.
Hacking HttpProvider
This step is a hack and should be done after you have executed npm to install the web3.js library. HttpProvider is a component of the web3.js library that provides the functionalities to connect to an Ethereum Blockchain. However, the implementation of HttpProvider’s setting of a connection header when connecting to a node is somewhat problematic. So here’s what we will tweak so that it works.
Go to \node_modules\web3-providers-http\src\index.js. Hunt for the following lines.
HttpProvider.prototype._prepareRequest = function(){
    var request = new XHR2();

    request.open('POST', this.host, true);
    request.setRequestHeader('Content-Type','application/json');

    if(this.headers) {
        this.headers.forEach(function(header) {
			request.setRequestHeader(header.name, header.value);
        });

    }
    return request;
};
And change it to this:
HttpProvider.prototype._prepareRequest = function(){
    var request = new XHR2();

    request.open('POST', this.host, true);
    request.setRequestHeader('Content-Type','application/json');

    if(this.headers) {
		request.setRequestHeader(Object.keys(this.headers)[0], Object.values(this.headers)[0]);
    }

    return request;
};
The line of codes request.setRequestHeader(Object.keys(this.headers)[0], Object.values(this.headers)[0]); will form a request header using the CONNECTION HEADER authorization when connecting to CONNECTION URL.
Testing MVW with Kaleido
We are now ready to test. Execute mvw.
expo startCreate a new wallet.
Fund the wallet with Kaleido’s Ether Pool Service.

During the step of “Deploying a Smart Contract in Kaleido” you would have copied the address of the StringStorage Smart Contract. Go to Properties to enter the address of this Smart Contract under “Contract Address”.

Now go to Contract. If you have funded your wallet, it should now have some ETH. You can execute the Smart Contract by providing it with a new string of text of your choice.

What’s Next?
As of this writing, a Pull Request has been made by Kaleido to the folks maintaining web3.js. Until this bug has been fixed, this is how you will connect a React Native wallet to a Kaleido Ethereum node.
Credits to Adam Chasen of Kaleido who provided assistance in the use of authorization headers.
Photo by Jessica Ruscello on Unsplash