Ethereum, Bitcoin and many other cryptocurrencies have fallen to new lows in September 2018. Vitalik Buterin, the creator of Ethereum said that Blockchain is now at the stage where we are “Go(ing) from just people being interested to real applications of real economic activity“.
Indeed even if you asked folks who have bought into cryptocurrency during its height early this year what a Blockchain really does, many wouldn’t be able to tell you. There just isn’t enough real economic activities happening in Blockchain today.
In writing this step-by-step guide, I wish to reach out to explain what Smart Contract are and I believe that the best way to do so is to walk through an example that you can try.
Let’s begin.
In Preparation
Read “Escrow Service as a Smart Contract” to understand how a seller and a buyer can trade securely without a trusted middleman between them.
Then visit MetaMask to install a digital wallet on your Chrome browser. A digital wallet is where you keep your cryptocurrency.
On MetaMask, change the network to “Ropsten Test Network” so that you don’t need to spend real ETH to try this demonstration.
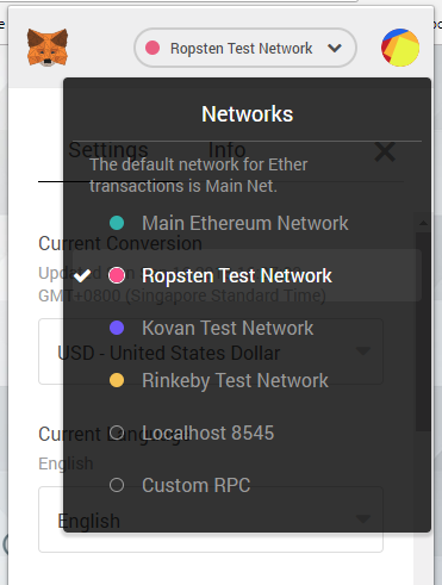
Create 2 accounts on MetaMask. One account will serve as the seller and another will serve as buyer.
On both accounts, visit the Ropsten MetaMask faucet for some free ETH so that you can run the transactions. You will need at least 3 ETH for each account.
Playing Seller
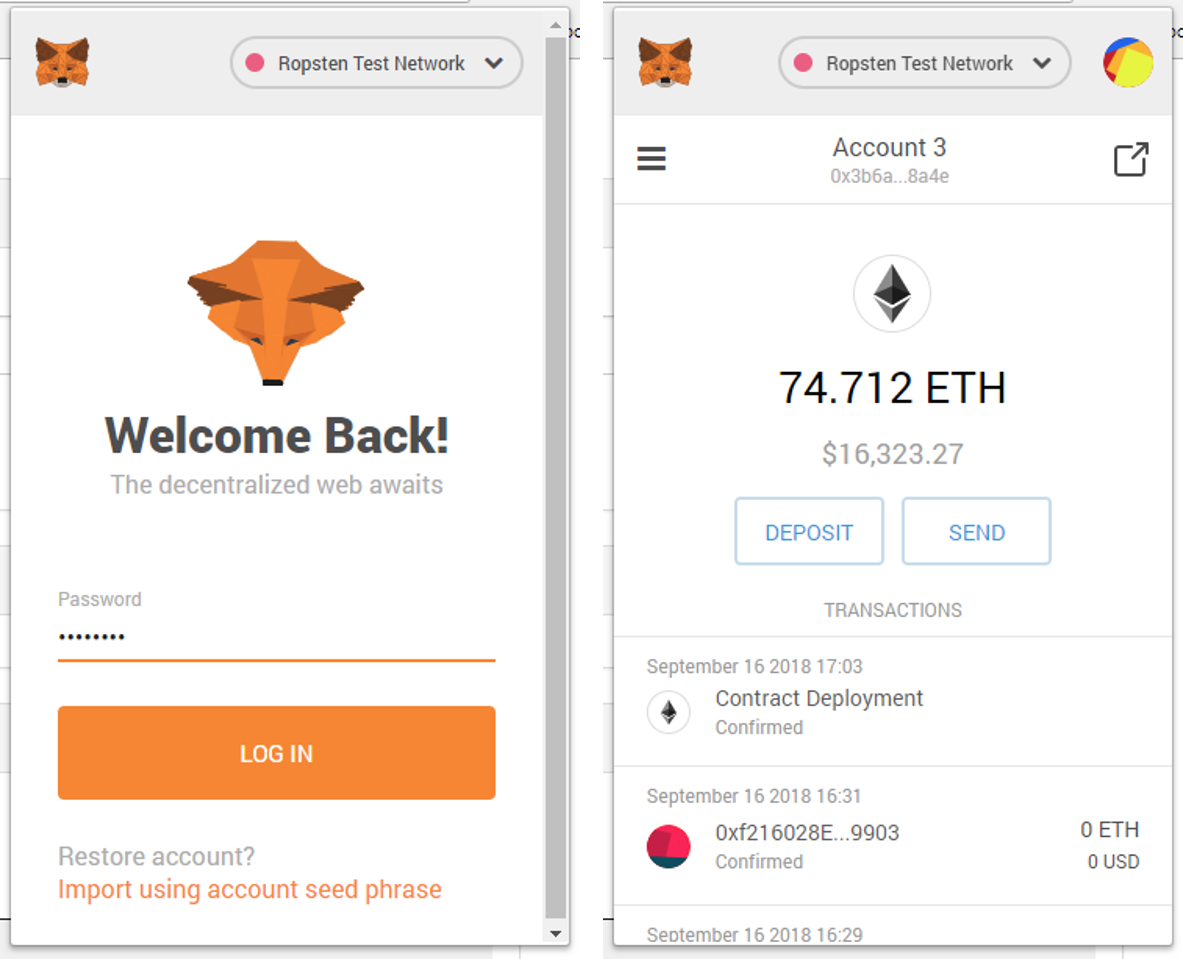
Change your MetaMask to the seller’s account. Here, my seller account is called “Account 3” and it currently has 74.712 ETH.
Visit https://jacksonng.org/codetest/escrow/index.html. This is the seller’s app. Enter the price of the item that you are putting up for sale. Assuming that you are selling something for 1ETH, you will need to enter double the amount of ETH you are selling the item for, which will be 2 ETH in this case. Don’t worry, by the end of the transaction, you will be refunded.

Click [Select Image] to select a picture of the item you are selling. The MetaMask window pops up to ask you to confirm that you are staking 2 ETH to sell your item. Press [Confirm].

Now wait for the transaction to execute on the Blockchain. When it is done, you should see the following fields:
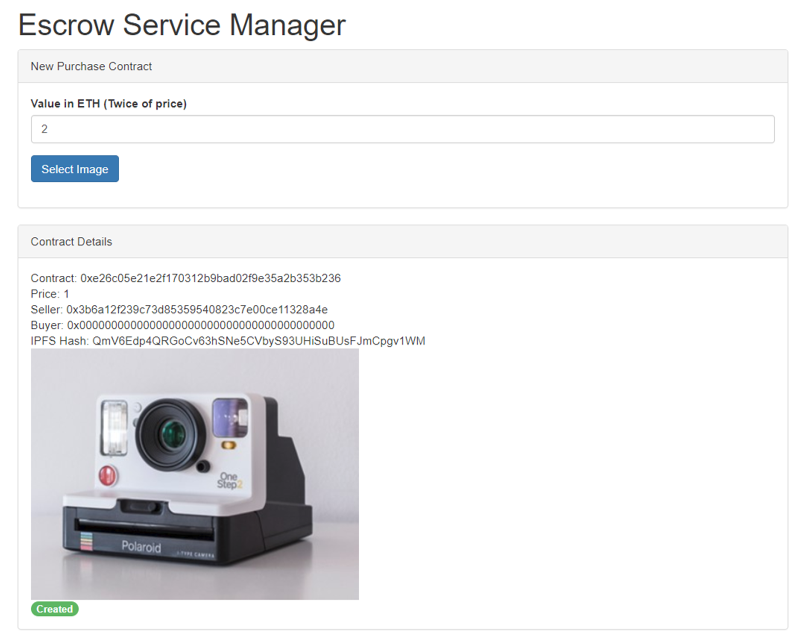
- Contract: This is the address generated for the new Smart Contract to sell this item. Copy this address, you will need it later.
- Price: 1 ETH, that’s how much you will be selling this item.
- Seller: That’s your wallet address.
- Buyer: There’s nothing here now because you haven’t found a buyer.
- IPFS Hash: The image isn’t stored in the Smart Contract. It’s stored on a decentralized file system called IPFS. This is the location of the image file on IPFS.
It also says here that you contract is [Created] (in green).
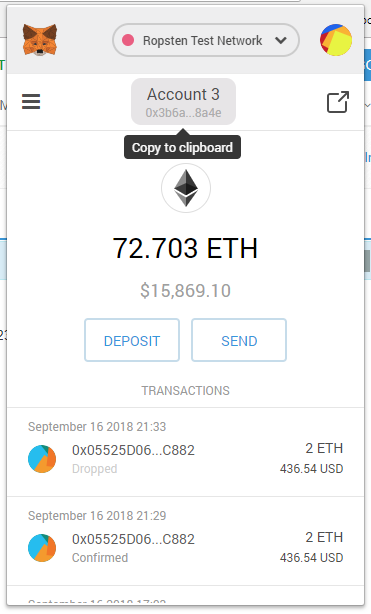
Take a look at your account. You now have 72.703 ETH because 2 ETH of your has been staked in the Smart Contract. The difference (74.712 – 2 – 72.703 = 0.009) ETH has been sent as gas to run this Smart Contract. Copy your wallet address on MetaMask.
Visit https://ropsten.etherscan.io and paste your address in textbox. This is your wallet address on the Ethereum Blockchain. The first transaction is the one that you have just executed. Click on TxHash.

This screen states what has just happened. You have generated a new Smart Contract to put an item up for sale. Click on the address of the Smart Contract.

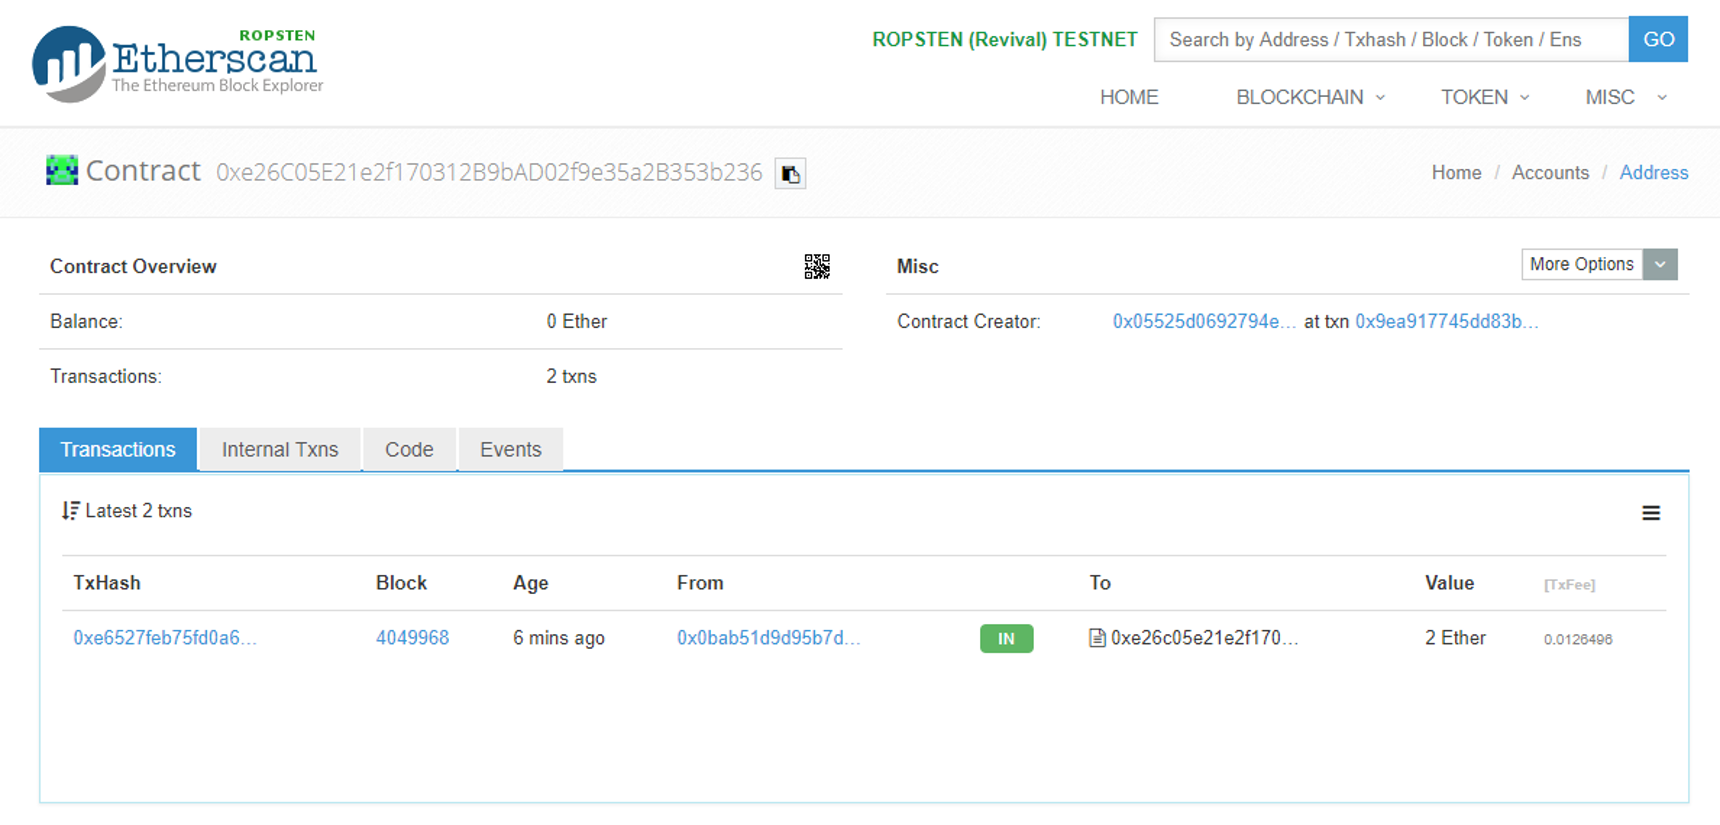
Notice that the Smart Contract has 2 ETH in it – this is what you have staked. Now all you need to do is to wait for someone to come to buy your item.

Playing Buyer
Imagine that you are now the buyer. Change your account on MetaMask to your buyer’s account. My buyer’s account currently has 24.565 ETH.

Open a new Chrome browser and go to https://jacksonng.org/codetest/escrow/purchase.html. You are now ready to buy the seller’s item. Copy the Smart Contract that the seller has created in the Contract Address window and press [Get Contract]. The item’s details come up.

You are now ready to buy. Since the item cost 1 ETH, the Smart Contract requires you to stake double the amount of ETH the item cost, which is 2 ETH in this case. Click [Purchase]. Again, not to worry; you will get refunded for the amount you “over-paid”.

The MetaMask wallet window pops up. Confirm your spend.
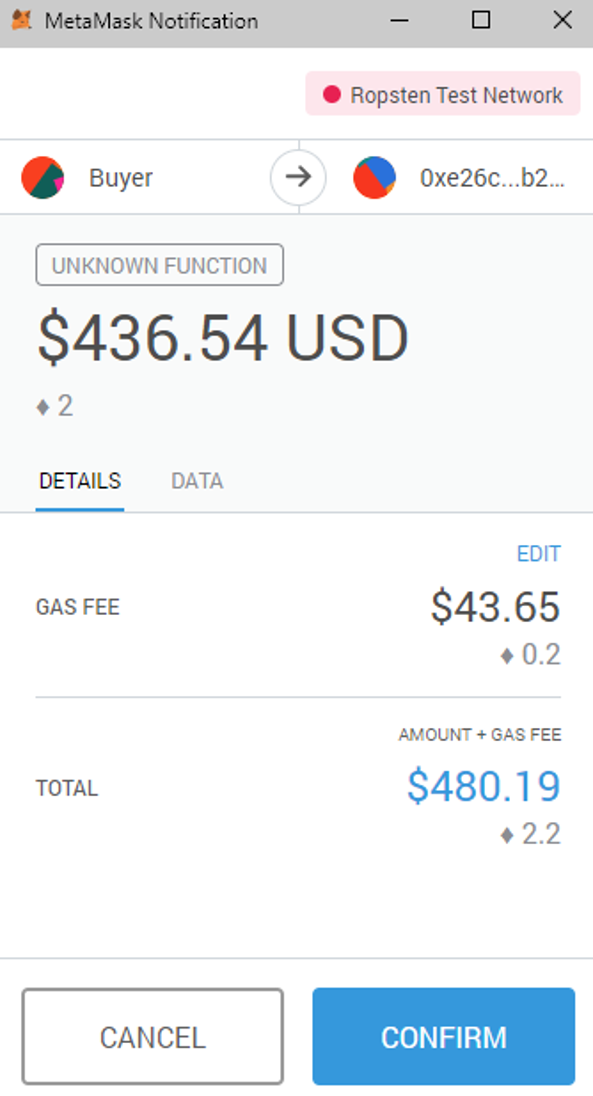
Now wait for the transaction to execute. Go back to http://ropsten.etherscan.io to look at the Smart Contract. Notice that it now has 4 ETH in it, 2 from the seller, and 2 from the buyer.

The purchase screen now says that the item is “Locked”. At this stage the Smart Contract no longer allows the buyer nor the seller to back out from the deal. The seller sees that the buyer has paid 2 ETH into the contract and and now feels safe to ship the item.
Assuming that you have received the item, click [Deliver].
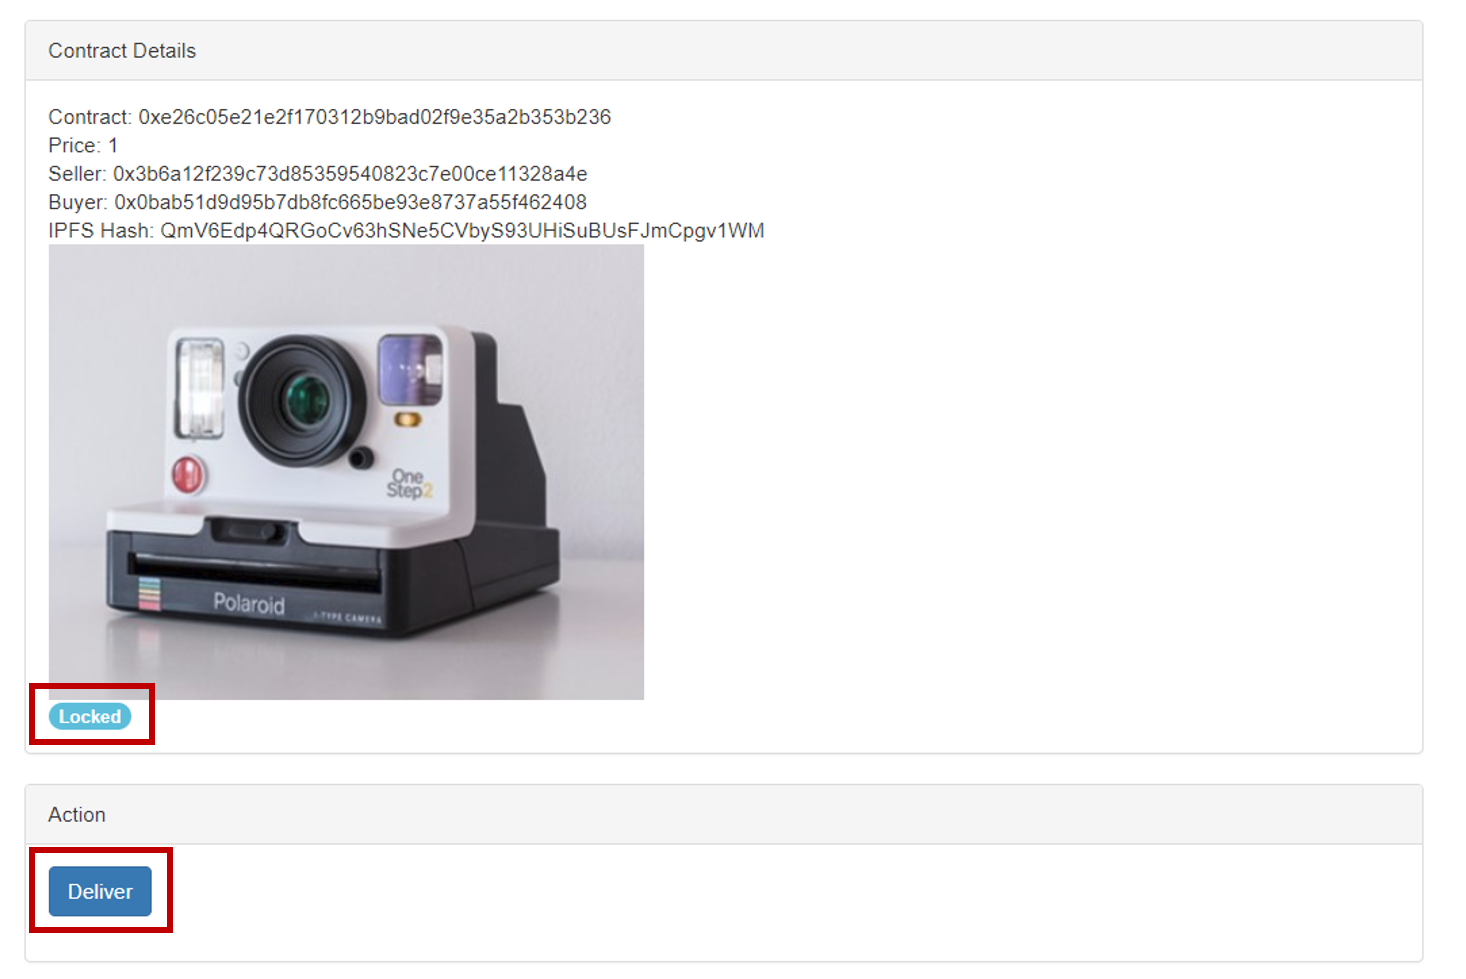
And then [Confirm] this transaction in at the MetaMask wallet.

The item now says “Inactive”. The Smart Contract has completed its job.

Now go back to http://ropsten.etherscan.io to look at the Smart Contract. Notice that it no longer holds any ETH.
Let’s take a look at what happened to all the ETHs.
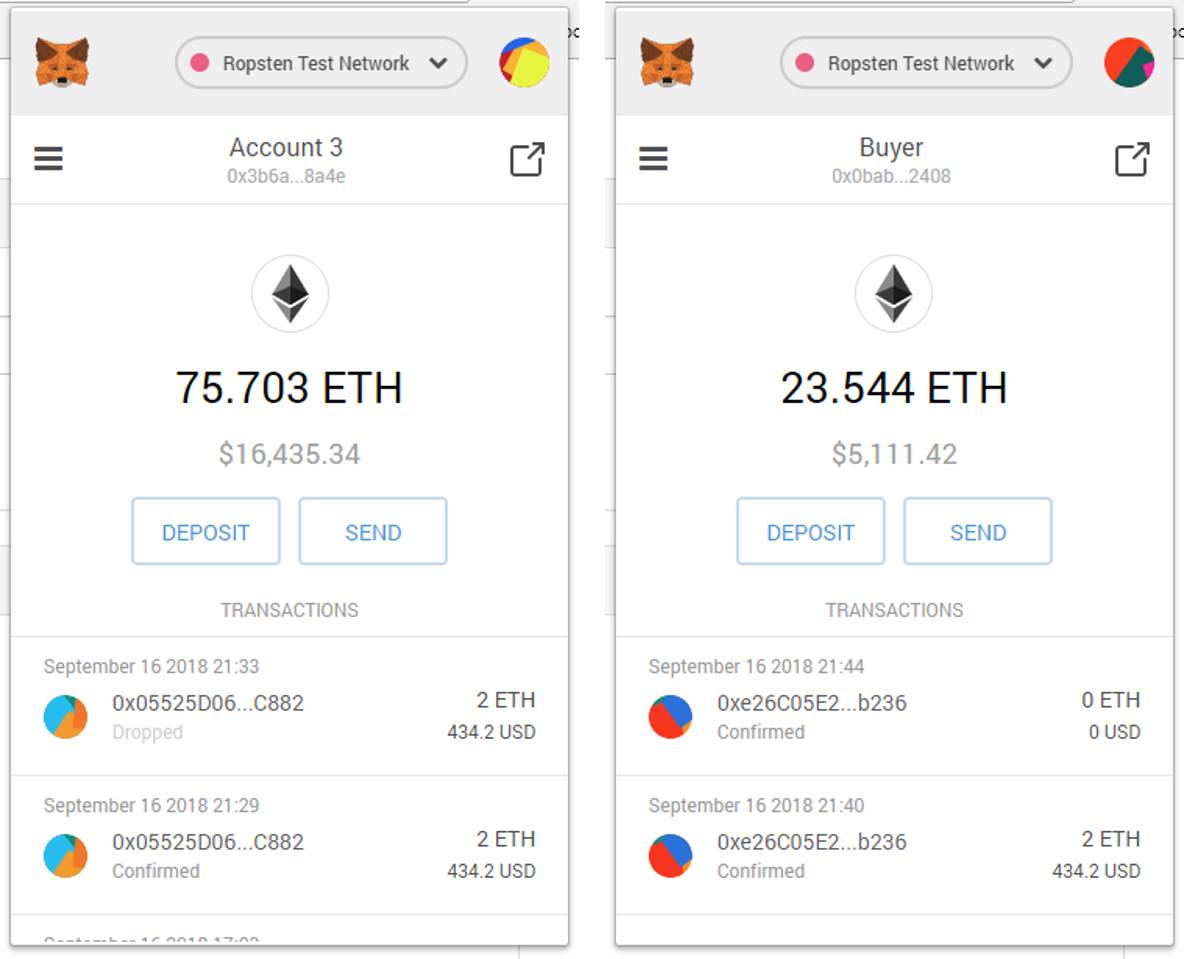
- The seller now has 75.703 ETH, 1 more ETH than when he started out – which is correct since he sold his item for 1 ETH.
- The buyer now has 23.544 ETH, 1 less ETH than when he started out – which is correct too, since he bought the item for 1 ETH.
- The extra ETH from the seller and buyer which served as collaterals to ensure that both sides execute their part of the deal have been duly refunded to them by the Smart Contract.
Think About It
In this transaction, the Smart Contract did all the job of ensuring both seller and buyer played their roles in the deal. There was no need for a middleman, and neither was there any fear that any parties will pull out from the deal, taking money or item with him.
The whole process runs on the Blockchain so every transaction is transparently documented. Unlike a typical trading platform, where the operator could shut down, or even flee with the money passed to him by both parties, the Blockchain is decentralized, maintained by every ‘node’ that participate in the platform. Nobody can shut it down.
The last piece of the puzzle is the gas that both parties paid to run these transactions. Gas is paid to the miners, which are ‘nodes’ on the blockchain that helps to verify the transactions and to put them permanently on the Blockchain. By paying gas, you are assured that somebody will definitely be serving as ‘nodes’ to verify your transaction.
What’s Next?
This demonstrate should give you a good idea of the potential of a public blockchain like Ethereum.
If you have just been reading, please do try the app! Better still, do it with a friend.
And if you are developer, read the following:
- “Escrow Service as a Smart Contract” where I demonstrated how the Smart Contract is executed in Remix.
- “Calling Smart Contracts from Smart Contract” where I explained how the Escrow Service Smart Contract works.
- “The Curious Marriage between IPFS & Ethereum” where I explained how files are used in Ethereum Smart Contracts are stored in IPFS.
- “Smart Contract Escrow Dapp – Seller View” where I explained the codes behind the seller’s Dapp.
For folks who are keen to dive into DApps development of the seller and buyer apps demonstrated above, I will be writing another 2 articles to walk through the codes.
Photo by Markus Spiske on Unsplash
