
This article builds on the tutorial written by Michael Chan here. In his article, Michael demonstrated how to code a React.js Dapp that writes a file’s IPFS hash to an Ethereum Solidity Smart Contract and stores the file in IPFS. Michael Chan’s article is a great piece to follow if React.js is what you are seeking.
If you are looking to do this using HTML+JavaScript with jQuery, IPFS.js API and Web3.js hosted on CDNs, then read on.
Why IPFS with Ethereum?
Writing to the Ethereum Blockchain is expensive; it requires you to pay transaction fees in the form of gas. Thus it makes sense to write as little as you can on the Blockchain. Take the escrow service smart contract for example – for a seller to put up an item for sale, apart from just stating the price of the item, he should also include a handful of images, and if this is a deal between companies or cross borders then there will be piles of trade documents in PDF. You could serialize these documents and store them as binary data in the Smart Contract. But you are likely to burst your budget if you do this.
Enters InterPlanetary File System (IPFS), an off-chain decentralized storage network.
IPFS is easy to explain if you understood the concept on Bittorrent. In Bittorrent, there’s no centralized server that stores the files that people share on the network. Everyone who’s downloading keeps some parts of the file that he’s in the middle of downloading. When others are looking for the same file on the network, he becomes a source that others can download from.
In this way, the number of copies of popular files that everyone wants increases quickly and this speeds up downloads. Bittorrent is a peer-to-peer file sharing network that benefits from the number of people who uses it. IPFS re-imagines file storage on the Internet in the same way. Instead of storing files in specific locations in servers, IPFS takes a hash of the file you want to put on the network and name the file as its hash value. If you need a file, just ask about it on the IPFS gateway. Nodes that have a copy of it will be a source that you can download from.
This short description of IPFS doesn’t do the concept justice. Please do visit http://ipfs.io to learn about how it works.
IPFS with Ethereum
Now imagine that I have a product to sell and I will like to advertise it on the Ethereum Blockchain. I wouldn’t want to keep the image of the product in the Smart Contract as it will be prohibitively expensive to do so. Traditionally, I can keep the information about the image file’s location in my server and update the Smart Contract with the location details.
There are 2 shortcomings with this method. Publishing my product as a Smart Contract on the Blockchain has eliminated the need for me to maintain my own server but ironically, I now need to maintain a server to stores its image.
And then there’s the fear that my prospective customers now have that I may somehow alter the image of the product while keeping its filename the same.
Here’s how IPFS solves these problems:
- IPFS is decentralized. Once I publish my image file on the IPFS network, I only need to seed it on my own IPFS node until enough folks on the network holds a copy. Then it’s there for as long as there’s a demand.
- A hash is obtained based on the image file’s binary codes. The file is retrieved by searching for it with its hash. This means I wouldn’t be able to replace my image with another one because my prospective customer knows that the file has changed when its hash changes. My customers are assured that the hash code is immutable on the Ethereum Blockchain and the file is immutable on IPFS.
Try it!
To begin, install MetaMask on your Chrome browser. Make sure that you are on the Ropsten Test Network because this is where i have deployed my IPFS Smart Contract.
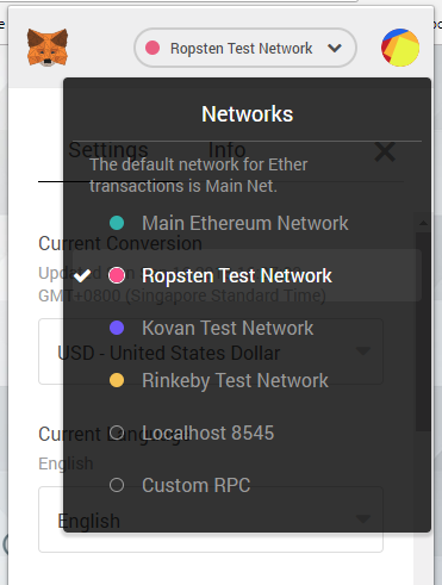
Visit the Ropsten MetaMask faucet for some free ETH so that you can run your transaction. Then visit https://limegreen-loris-370721.hostingersite.com/codetest/ipfs/.

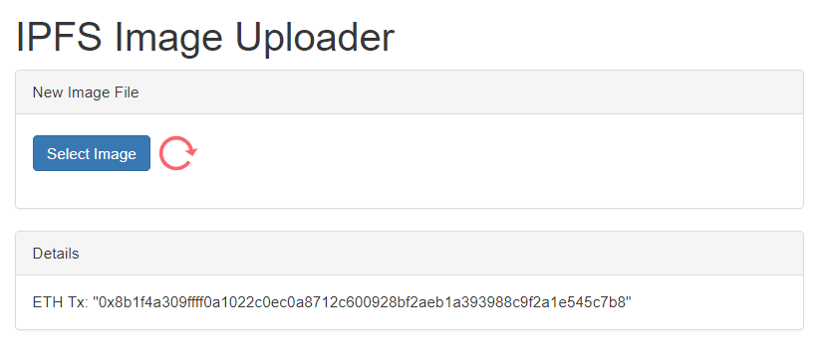
Select an image from your machine. Remember to select only an image that you don’t mind the world seeing.
The MetaMask wallet pops up to let you confirm your transaction.

This is what happens after you have selected the image:
- The image gets uploaded to IPFS.
- A Hash is generated.
- Via your MetaMask wallet, you confirm that you are paying for the hash to be written to thetSmart Contract.
- A transaction ID is generated. Now you need to wait patiently while this transaction gets mined on the Ethereum Blockchain.
While you are waiting, copy the Transaction ID.
Then visit http://ropsten.etherscan.io, paste the transaction ID in the window and monitor it while it is being written to the Blockchain.

It will finally be written to the Ethereum blockchain and you will see your picture displayed here.

If you right-click on the image and read it’s address, this is how it may look like.
https://gateway.ipfs.io/ipfs/QmRqQJ72etcHUouTpxByhJ6Z4p7zaJw1Mda9fcvwZsxgKzThis is IPFS’s public gateway to your file. The hash code that begins with “QM….” is used as a “fingerprint” for gateway.ipfs.io to locate your file which is now floating in the IPFS node that was stated in my code, and later on, some other IPFS nodes as more folks begin to access the file.
The Smart Contract
Here’s the codes to ImageHash.sol which is a slight modification of Michael’s codes here. Here’s what I added.
event savedHash(

);
(Lines 5 to 7) I wish to know when the hash has been updated in the Ethereum Blockchain network. So I added this event.
emit savedHash();(Line 11) After the ipfsHash has been set, I will trigger the saveHash() event.
You can copy and paste this Smart Contract in Remix and deploy it. Or you can use mine, which I have deployed here.
The DApp
Find the DApp codes here. I will highlight and explain the noteworthy lines.
<script src="https://cdn.jsdelivr.net/gh/ethereum/web3.js/dist/web3.js"></script>
<script src="https://unpkg.com/ipfs-api/dist/index.js"></script>
(Lines 13 and 14) Here, I include the web3.js and ipfs-api.js libraries. Web3.js lets me transact on the Ethereum blockchain and ipfs-api.js lets me transact on the IPFS network.
if (typeof web3 !== 'undefined') {
    web3 = new Web3(web3.currentProvider);
} else {
    // set the provider you want from Web3.providers
    web3 = new Web3(new Web3.providers.HttpProvider("http://localhost:8545"));
}
(Lines 50 to 55) I am checking if this HTML+JavaScript codes are running on a Chrome Browser with MetaMask Wallet installed on it. If it doesn’t, I will check if there’s an Ethereum node is running locally that I can use.
ipfs = new window.IpfsApi('ipfs.infura.io', '5001', { protocol: 'https' });
ipfs.id(function(err, res) {
	if (err) throw err
		console.log("Connected to IPFS node!", res.id, res.agentVersion, res.protocolVersion);
});
(Lines 56 to 60) I attempt to connect to the IPFS node that Infura runs. Infura runs a public IPFS node that anyone can write to. If you wish to run your own IPFS node, refer to this tutorial.
web3.eth.defaultAccount = web3.eth.accounts[0];(Line 61) I choose the first Ethereum account in my MetaMask wallet to execute my transaction.
var Buffer = window.IpfsApi().Buffer;(Line 62) Files to be uploaded to IPFS must be serialized into a buffer. Here, I initialize the buffer.
var ImageContract = web3.eth.contract(
	[
		{
			"anonymous": false,
			"inputs": [],
...
...
(Lines 63 to 100) This is the Smart Contract’s ABI. You can copy this from Remix where you deployed the Smart Contract.
var ImageContractCall = ImageContract.at('0xf216028e096c969ec85302651de4584a606e9903');
console.log(ImageContractCall);

var ipfsHash;
(Lines 102 to 105) I reference the Smart Contract on the Ropsten Testnet and declare an ipfsHash variable which I will use later.
$("#file-upload").change(function() {
    //source:https://stackoverflow.com/questions/29805909/jquery-how-to-check-if-uploaded-file-is-an-image-without-checking-extensions
    var file = this.files[0];
    var fileType = file["type"];
    var ValidImageTypes = ["image/gif", "image/jpeg", "image/png"];
    if ($.inArray(fileType, ValidImageTypes) < 0) {
        window.alert("you didn't choose an image");
    }
    else {
		$("#loader").show();
        var reader = new FileReader();
      	reader.onload = function() {
			mybuffer = Buffer.from(this.result);
            ipfs.files.add(mybuffer, function(err, result){
               	if (err) {
        			console.log("Error");
      			}
               	else {
                   	ipfsHash = result[0].hash;
                   	ImageContractCall.setHash(ipfsHash, {gas: 1000000, gasPrice: web3.toWei(2, 'gwei')}, function(error, result){
						if(!error){
							$("#tx").html("ETH Tx: " + JSON.stringify(result));
						}
						else{
							console.error(error);
						}
                    });
				}
            });
		}
		reader.readAsArrayBuffer(this.files[0]);
    }
});
(Lines 107 to 139) This set of codes executes after the user chooses the image.
(Lines 108 to 114) I check if the user really uploaded an image. If it’s not an image, I pop a a validate message.
(Line 117 to 119, 137) Using a FileReader, I read the image file that the user uploaded and converts it into a buffer. IPFS.js requires contents to be a buffer before it will accept it.
(Line 120) I add the file to IPFS.
(Line 125) IPFS returns me the hash code of my file. I save this code in ipfsHash.
(Line 126) Here’s where I call setHash() in my Smart Contract to write ipfsHash to my Smart Contract.
var savedHash = ImageContractCall.savedHash();
   	savedHash.watch(function(error, result){
        if (!error)
        {
          	ipfs.pin.add(ipfsHash, function (err) {
           	if (err){
				console.log("cannot pin");
            }
            else{
               	console.log("pin ok");
            }
        });
        $("#loader").hide();
        $("#ipfshash").html("IPFS Hash: " + ipfsHash);
        $("#imgdiv").html("<img src=https://gateway.ipfs.io/ipfs/" + ipfsHash + " width='400'>");
        } else {
            $("#loader").hide();
        }
 });
(Line 140 to 141) savedHash() is an event that the Smart Contract will trigger when the hashcode of the image has been written to the Smart Contract successfully.
(Lines 142 to 150) If the savedHash() event is triggered, I know that the hashcode of the image has been written to the Smart Contract and I should now keep my image in IPFS permanently. Here’s where I attempt to pin the image. When you pin a file in IPFS, you are telling the IPFS node that you have stored the file to host the file permanently and not garbage collect it.
(Lines 152 to 156) Now that everything is done, I display the ipfsHash value as well as the image by getting it from gateway.ipfs.io.
What’s Next?
I have added this IPFS image feature to my Escrow Purchase Smart Contract so that I have a Buy and Sell system where both parties can see what they are trading on the Blockchain.
I will write about this in my next article.
Photo by Henry & Co. on Unsplash