
Solidity as a programming language has been most intriguing for me because of its many features that I haven’t come across in languages that I have been more familiar with. One example is the underscore like the one in line 10 below.
The underscores _; that are found littered in Smart Contract source codes have invited questions from developers all over who are just beginning to code Smart Contracts. There has been many attempts to explain the _;. Find it here, here and here.
Jordan and I spoke about writing yet an article to explain what the _; does in Solidity just to enter the fray. So here’s my attempt…
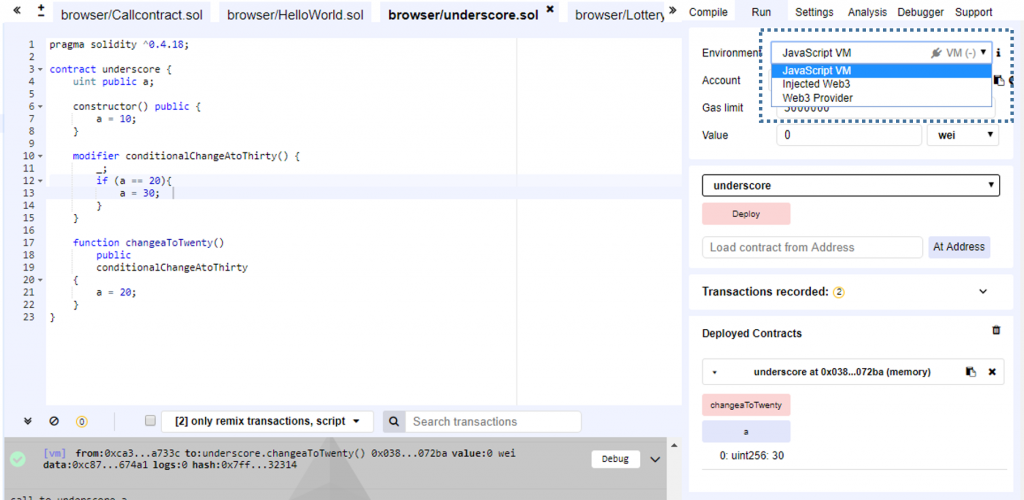
Test this contract in Remix in a local JavaScript VM environment.
When _; Comes First
Here, we declare a modifier: conditionalChangeAtoThirty().
modifier conditionalChangeAtoThirty() {
        _;
        if (a == 20){
            a = 30;
        }
}
It looks at the public variable a, checks if it is 20. If it is, the modifier sets a to 30. Ignore the _; for now. We will come back to look at it later.
And then we declare the function changeToTwenty().
function changeaToTwenty()
        public
        conditionalChangeAtoThirty
{
        a = 20;
}
Notice that it runs the conditionalChangeAtoThirty() function. Here’s how.
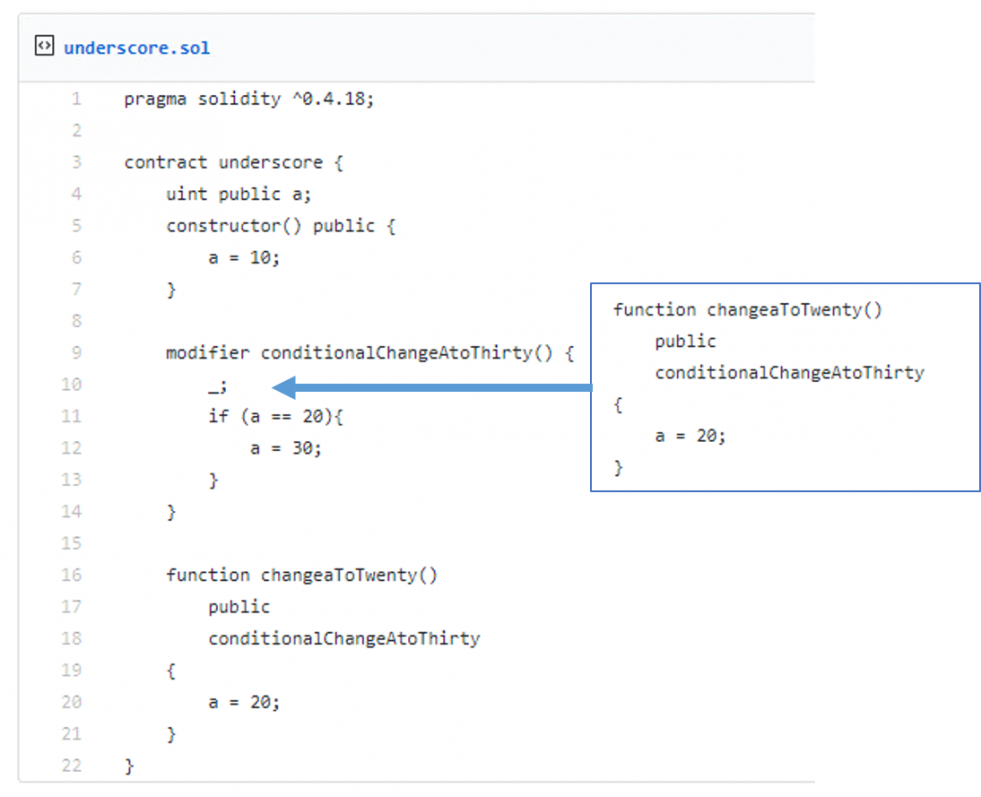
Solidity finds the _; in the conditionalChangeAtoThirty() modifier and executes changeaToTwenty() right there. Here, a = 20 is executed first, then the modifier checks if a is 20. If it is, it sets a to 30.
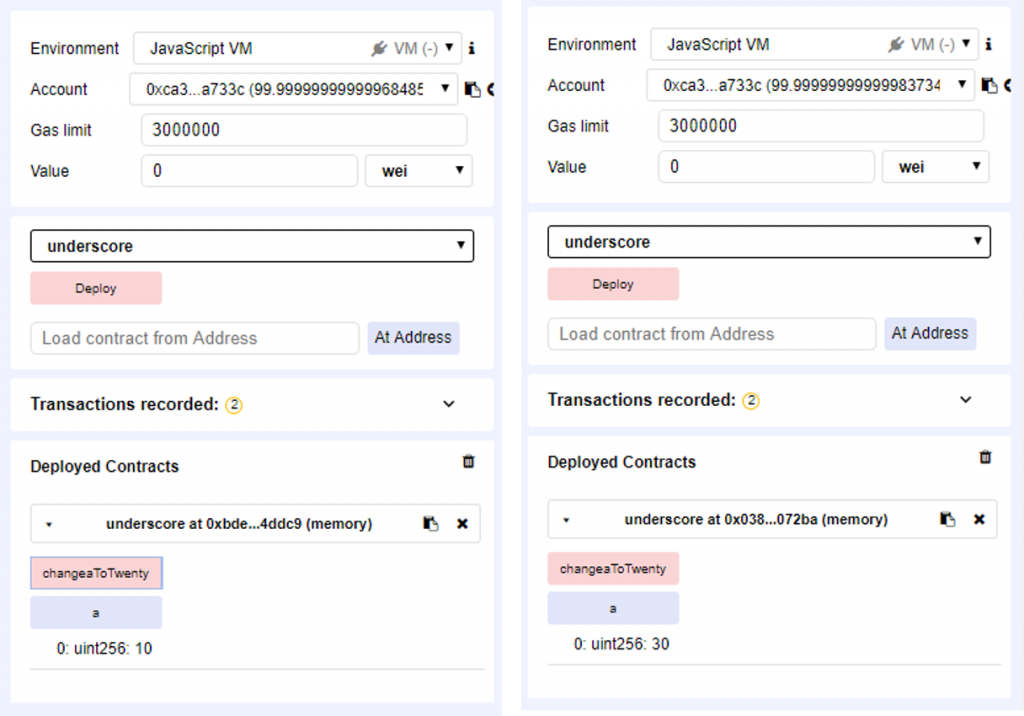
To test this, deploy the smart contract in Remix, then click [a]. a is 10.
Then click [changeaToTwenty]. Then click [a] again. a is now 30. The modifier executes changeaToTwenty() to change a to 20, then executes the remaining lines. It notices that a was 20 and then changes it to 30.
When _; Comes Later
Here’s what happens when the _; comes later.
modifier conditionalChangeAtoThirty() {
    if (a == 20){
        a = 30;
    }
    _;
}
Solidity finds the _; in the conditionalChangeAtoThirty() modifier and executes changeaToTwenty() right there. This time, it checks if a == 20 first. It isn’t, since at this point, a was initialized to 10 by the constructor. Since a is not 30, line 11 does not execute. The function changeaToTwenty() runs and a is set to 20.
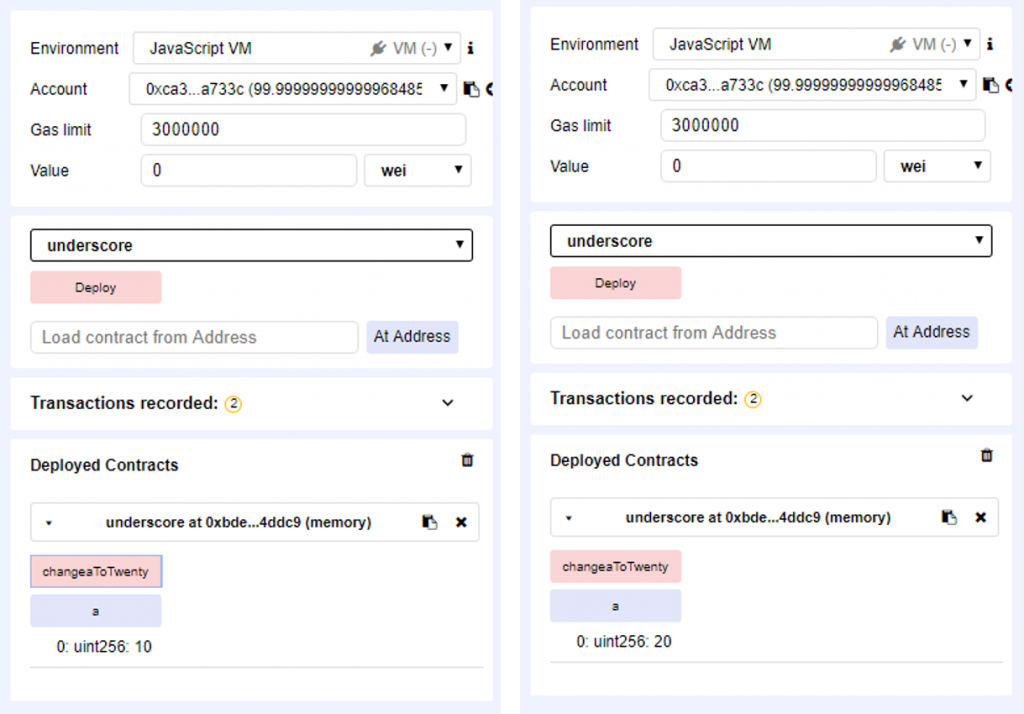
To test this, deploy the smart contract in Remix, then click [a]. a is 10.
Then click [changeaToTwenty]. Then click [a] again. a is now 20.
Real World Usage
Here’s an example of a real world usage of modifiers and _;. Safe Remote Purchase (code here) has several modifiers. One example is onlySeller(). onlySeller() checks if the function that uses the modifier is called by the seller. The _; comes after this check to ensure that the function doesn’t run unless the caller is the seller.
modifier onlySeller() {
    require(
        msg.sender == seller,
        "Only seller can call this."
    );
    _;
}
Conclusion
And that’s my attempt to explain what _; in Solidity does. Please tell me how well (or badly I did)!
Photo by Thought Catalog on Unsplash